Forex Pro Island Installation Guide
OFFICIAL WEBSITE: www.forexproisland.com
Alright, so there is still some confusion about how to download, install, and configure the Forex Pro Island Bot to win trades. Right now, we are going to do a quick, concise, and easy to understand Forex Pro Island Installation Guide. If you follow these 10 simple steps, you should have the Forex Pro Island Automated Bot putting money in your pocket in just a couple of hours.

STEP 1: Download MetaTrader
The first step to use the Forex Pro Island Bot is to download MetaTrader 4. Remember that this autotrader application only works on MetaTrader 4, exclusively so. You can download MT4 through your broker. You can also just Google MetaTrader 4 and download it right from the official website. Install this MT4 trading platform once you have downloaded it. This is where you will install the FX Pro Island Bot.

STEP 2: Download Bot from ForexProIsland.com
The next step is to actually download the Forex Pro Island Automated Trading Bot. Simply go to the official website and click on any one of the download buttons on the site. You can find links to the official site here at the top and bottom of this installation guide. Download the file and save it somewhere easy to find on your computer, such as right on your desktop.
https://www.youtube.com/watch?v=9WvLNjHv7ZQ&t=299s
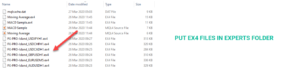
STEP 3: Paste x6 Bot Files into MQL4/Experts Folder
Now that you have downloaded the main file, the next step is to copy and paste each of the 6 bots into the MT4’s MQL4/experts folder. When you open up the Forex Pro Island file, you will see 7 separate files, 6 of them being the currency trading bots and one being the instruction manual. Here, you want to go into the MQL4/Experts folder in the MetaTrader 4 platform. Now, copy and paste, or drag and drop the 6 bot files into this folder. This needs to be done properly.
STEP 4: Paste SLM.dll File into MQL4/Libraries
The SLM.dll file also needs to be pasted into the MQL4/Libraries folder within the MetaTrader 4 platform. Simply open the libraries folder inside of the MQL4 folder and then drag and drop, or copy and paste the SLM.dll file into it. This is very easy and only takes a couple of seconds.
https://www.youtube.com/watch?v=1Cc-9g9Rsfw&t=15s
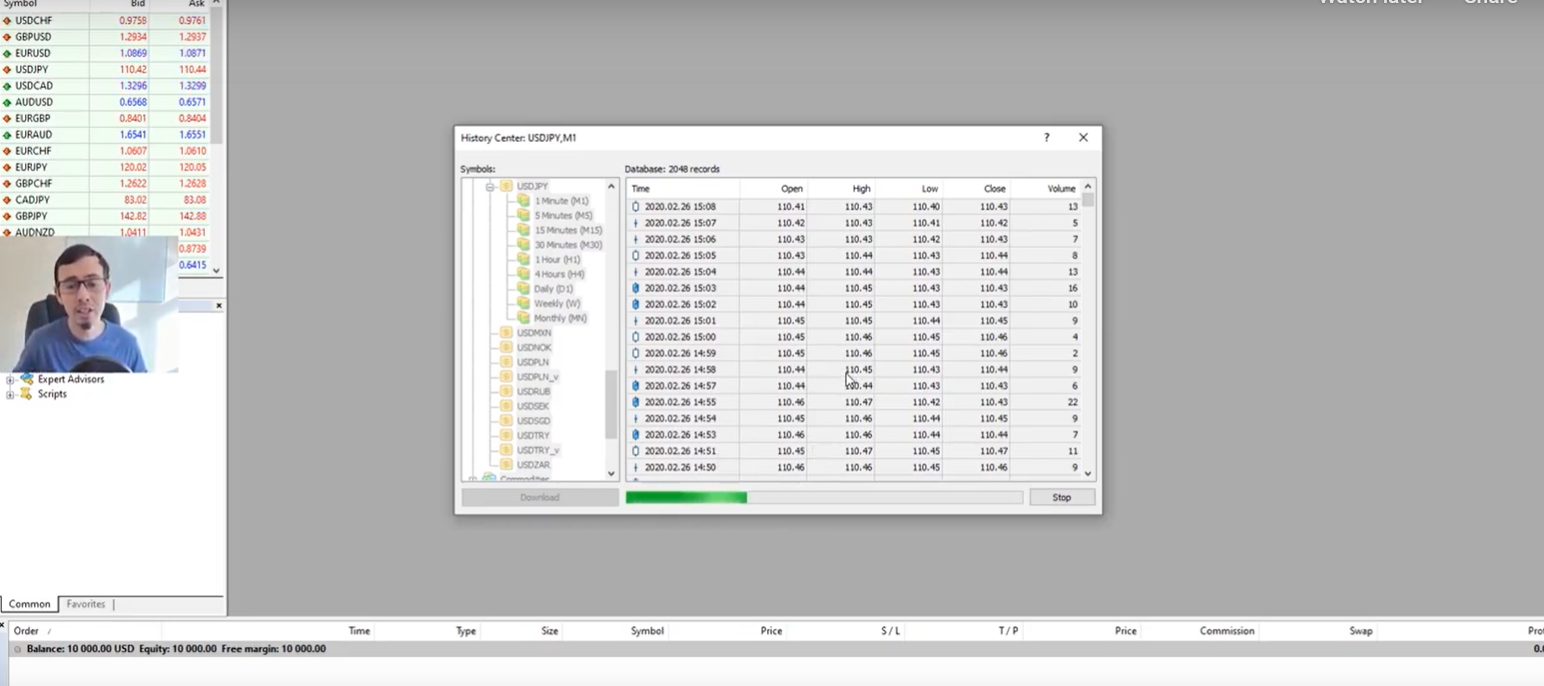
STEP 5: Download All History Charts on Your MT4 Platform for All 6 Forex Pairs
The next step here is to download all history charts for all timeframes for all of the 6 Forex pairs. Remember that the Forex Pro Island Auto Bot comes with 6 separate bots, each of which is designed to trade one specific currency pair. For the bot to work properly, you therefore need to have all financial history for all pairs downloaded.
You will need to download the history for AUD/USD, EUR/USD, GBP/USD, USD/CAD, USD/CHF, and USD/JPY. On the MT4 platform, go to the “tools” tab, go to “history center”, then click on “Forex”, then select the Forex pair you need to download the history for, then download all time frames. Triple click on each of the pairs and timeframes for each pair, and then download them.
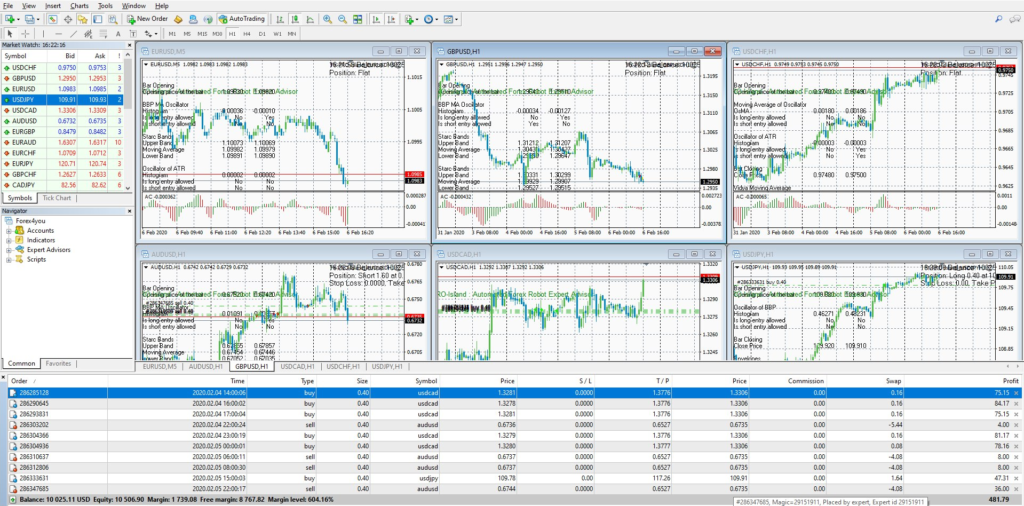
STEP 6: Open All 6 Forex Pair Charts
Now, using the MT4 platform, open up the charts for all 6 of the Forex pairs. Yes, you can open up all 6 of the FX currency charts at once. Make sure to open the charts for the corresponding timeframe which the bot in question is labelled for. For instance, if the bot is labelled as “H1” and it is for AUD/USD, then you’d need to open the AUD/USD H1 chart.
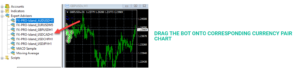
STEP 7: Drag & Drop Each Bot to Corresponding Charts
Now, go the expert advisors tab on the left side of the MT4 platform, right click on it and click on “refresh”. Now, open the expert advisors tab, and you will see each of the 6 auto trading bots included with Forex Pro Island Software. Select one bot at a time and drag and drop it into the corresponding chart. In other words, take the AUD/USD bot and drag/drop it into the AUD/USD chart.
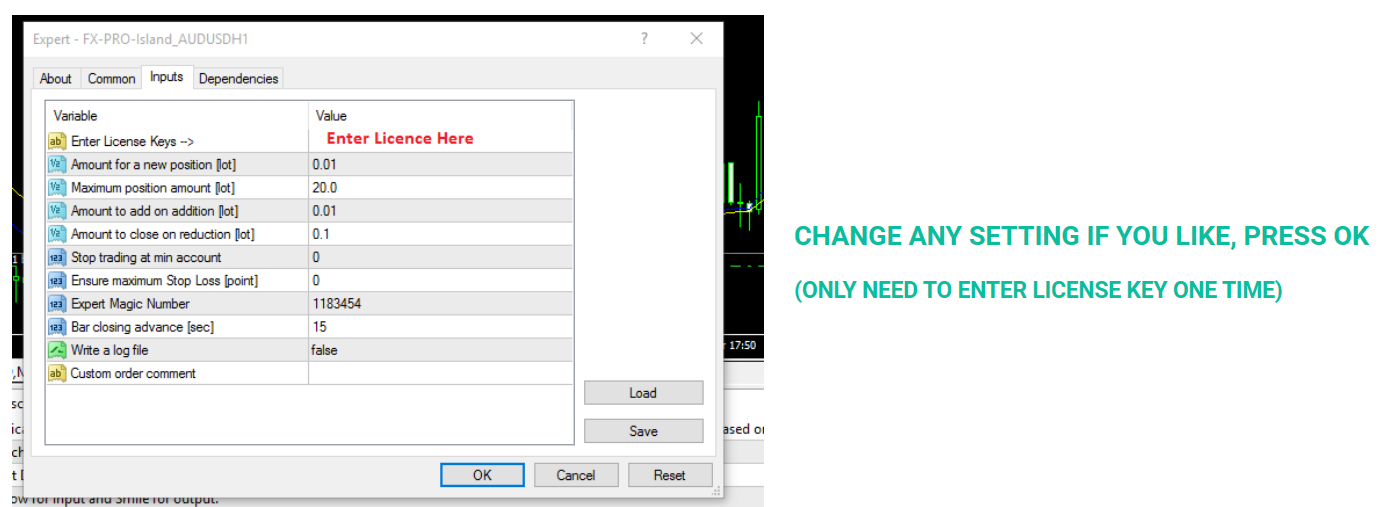
STEP 8: Enter License Key Received After Purchase
Once you have done this, using the window which appeared when you drag and dropped the bot onto the chart, after clicking on “OK”, you will need to enter your license key. You should have received your Forex Pro Island license key in your email after having signed up for and downloaded the bot. You need to enter the license key and click on OK. If you enter the right key you got, it should all work without issue.
STEP 9: Click on the Proper Settings – ALLOW!
One of the things that many people do not do, which needs to be done in order for this bot to work, is to allow multiple settings. Go to the tab labelled “common”. From here, you need to ensure that a variety of options are enabled. You need to make sure that the “allow DLL imports”, “allow live trading”, “enable alerts”, and “allow import of external experts” are all selected and turned on, or else this bot will not work.
STEP 10: Click on “Auto-Trading”
The final thing that you need to do in order for the Forex Pro Island Bot to work is to activate auto trading within the MT4 bot. To do this, simply go to the top of the screen. You will see a button labelled “autotrading”. Click it to turn it on. When it turns on, the button should go from red to green.
Forex Pro Island Installation Guide – Final Thoughts
If you follow these 10 simple steps of this Forex Pro Island installation guide, you should have no problems getting it to run properly. Please watch the videos which we have included here, as they go a long way in explaining this process and making it much easier.
Folks, taking your time to properly install the Forex Pro Island Auto Trading Bot, you will be very pleased with it. This is one of the best automated trading systems for Forex around, and we would absolutely recommend trying it out.
